Congratulations arriving in Bangkok and landing in Thailand! You have successfully cleared customs and immigration, got your bag and now you find yourself standing at the bustling Suvarnabhumi airport with so many people around you don’t know where to turn. But now, what’s next? How can you efficiently obtain cash and a SIM card? What are your transportation choices to reach the city? In this article, I will try to address all these first timer questions and provide you with additional info to ensure that your first hour or two in Bangkok until you get to the hotel goes smoothly. By following the advice presented in this guide, your trip to Thailand will undoubtedly be much easier and less stressful. Let’s dive in and begin exploring your options.
Suvarnabhumi airport or Don Muang airport?
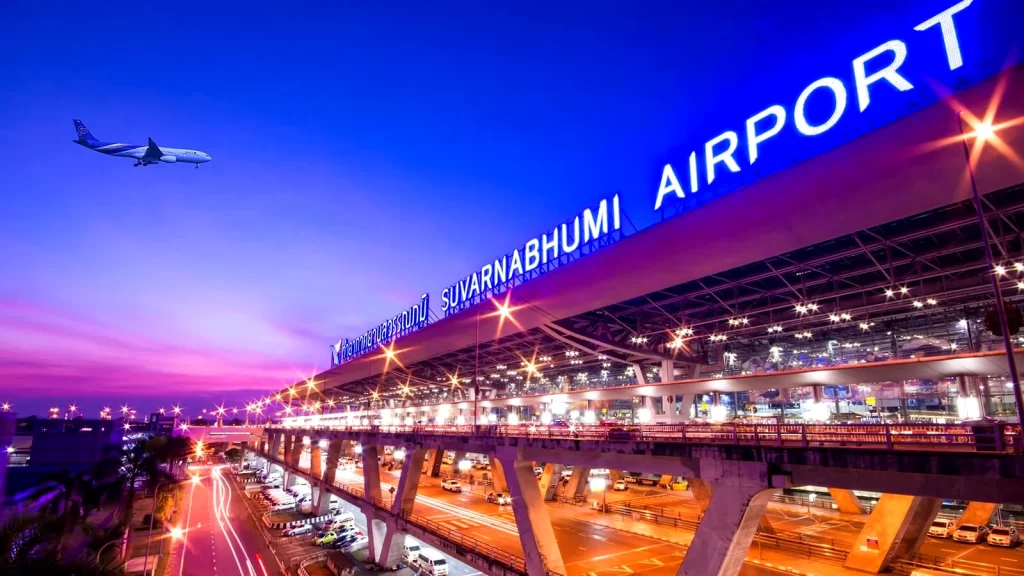
Bangkok is served by two airports: Suvarnabhumi airport, situated about 30 kilometers east of the city center, and Don Muang, located some 25 kilometers to the north of the city. Both airports cater to both domestic and international flights. However, Don Muang, being the older airport, primarily handles domestic flights. 99% of the time, you’ve arrived at Suvarnabhumi airport (pronounced “Su-wan-na-poom”), which opened its doors in 2006 and before the pandemic in the year 2019 it had over 65 million passengers annually with almost 29 million in 2022.. This bustling airport manages hundreds of daily flights, making it an always busy and vibrant hub for travelers.
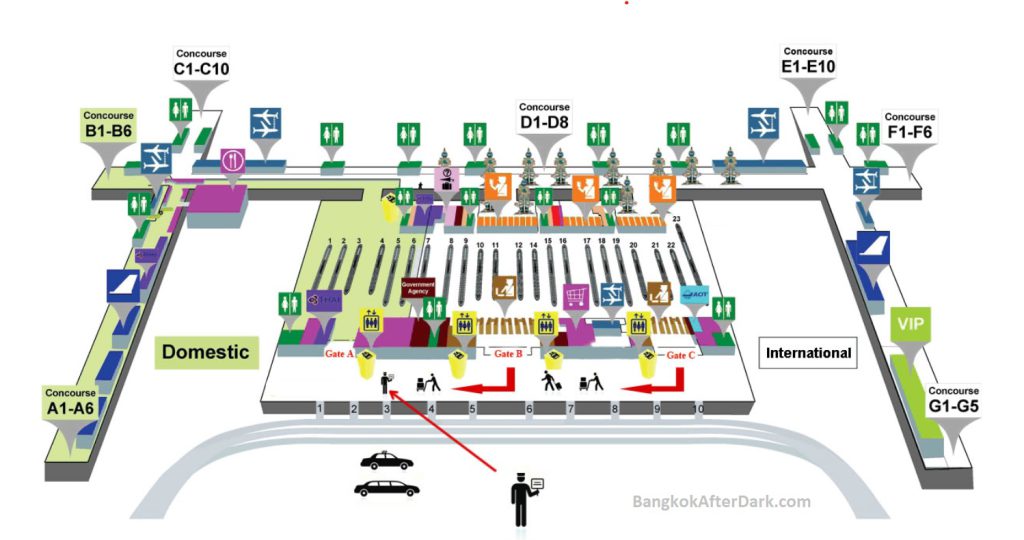
Although the massive scale of the Bangkok airport may initially appear overwhelming, the layout is surprisingly straightforward. Suvarnabhumi airport features a single main terminal building spanning four floors. Let’s take a moment to familiarize ourselves with the general layout before diving into navigation details.
- Level one, you’ll find various transportation options to and from the city.
- Level two is dedicated to arrivals, welcoming both international and domestic passengers.
- Level three serves as a versatile space, offering restaurants and meeting areas and sky bridges to the parking buildings.
- Level four is where all departures take place and is a big open space which can get very busy in the evenings.
As you can see, the setup is relatively simple and contained within a single building. Now that you have a basic understanding of the airport’s structure, let’s proceed inside, where I’ll guide you through the navigation process with ease and confidence.
Bangkok airport second floor arrivals:
Let’s kick off our exploration on the second floor, which is most likely where you’ll emerge upon arrival. First things first, you’ll need cash for various expenses, including street food, shopping, taxis, and even some refreshing ice cold beer. And don’t be shocked when you see Thais drinking beer from a glass with ice cubes in it 😀 You beer gets warm fast so ice is used to keep it cool for longer.
ATMs and money exchange at Bangkok Airport:
As you step out of the arrivals area, you’ll want to head to your right and you’ll come across several money exchange shops. If you head downstairs to the lower level, you might find slightly better exchange rates. However, for convenience, you can choose to exchange some Thai baht right away or, if you prefer, use an ATM card. Worldwide ATM cards generally work at most bank machines throughout Thailand. It’s essential to consider the costs involved in these transactions.
The current exchange rate at the exchange counter at the airport is 31.2 Thai baht per US dollar compared to about 33.71 per USD if you exchange it in a bank in the city. For example, if you exchange $1,000, you’ll receive 31,200 baht at the airport vs 33,710 baht in Bangkok bank in the city. So, by checking the market rate online, which is around 33.71, you can see that the exchange counter charges a significant percentage. So of you need to it would be best to change just a small amount at the airport that covers your first day in Bangkok and then later find a bank or an exchange in the city to change more. One of the best exchange places with the best rate is Super Rich (green or orange) and there are quite a few in Bangkok so just search for them on Google maps.
Using ATMs may involve two fees: a transaction fee charged by your home bank (typically around $5 but check with the bank before you leave) and also all ATMs in Thailand usually charge 220 Thai baht which is around 6.5 USD). There are AEON ATMs that charge 150 THB buy they are not that easy to find.
If you use an ATM make sure not to choose to be charged in your home currency and do not accept the exchange rate shown on the screen as the rate is awful and you can waste a lot of money that way. On ATMs or when paying something with your card overseas always choose to be charged in the local currency so in Thai baht when you are in Thailand.
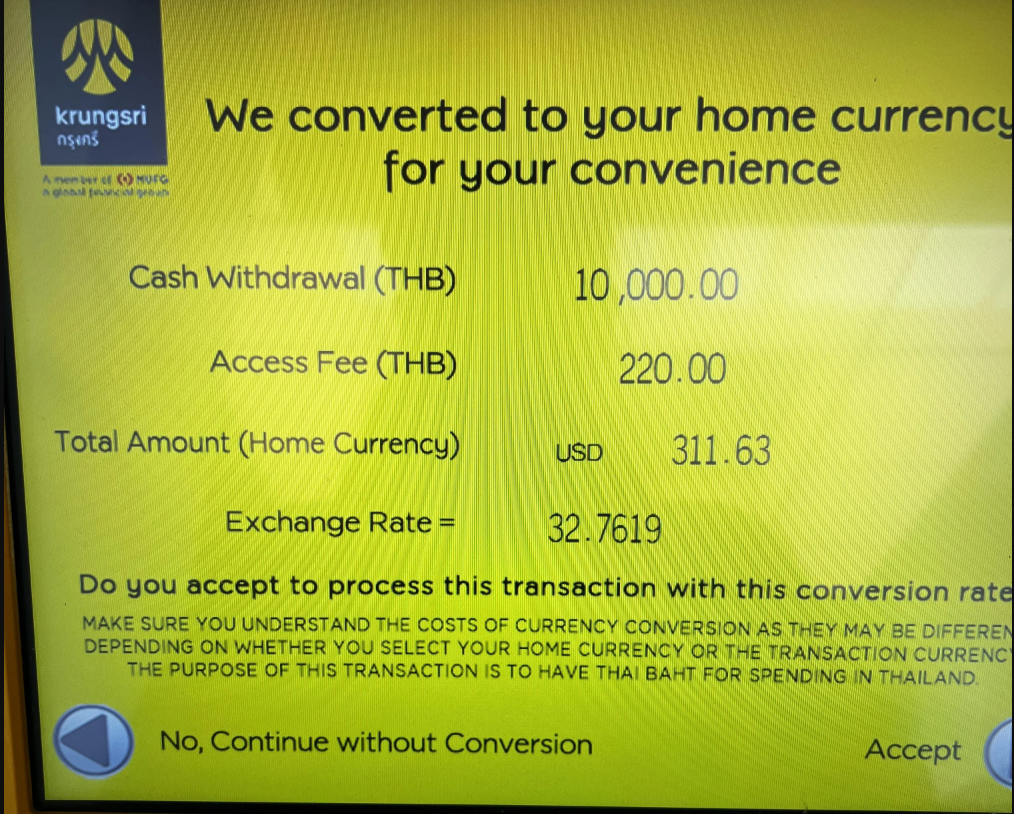
So, for the same $1,000, the total cost would be whatever you bank charges plus the 6.5 USD charge from the Thailand ATM. It’s important to note that the $6.5 transaction fee is a flat fee, so withdrawing small amounts could significantly impact the percentage of fees. For small amounts, it may be more favorable to use the money exchange, while for larger amounts, using an ATM could be preferable.
Pro Tip #1: Inform your bank about your international travel plans to avoid any issues with fraud protection when using ATMs. and using your card to pay for things. Don’t be like me on my first trip and arrive at your hotel just to be told none of your cards work and you have to make expensive overseas calls to your bank to sort it out.
Pro Tip #2: Consider using Wise (formerly TransferWise), a money transfer service that offers competitive currency exchange rates and you can even get a an international debit card from them in many currencies including Thai baht and avoid bad exchange rates and fees. They also waive their fees on your first transfer so click here and check them out. It is also very convenient to add money to the account with a credit card or bank transfer so you can instantly fill up online. You can also instantly send money to Thai bank accounts with very low fees.
How to get a SIM card and internet at Bangkok Airport?
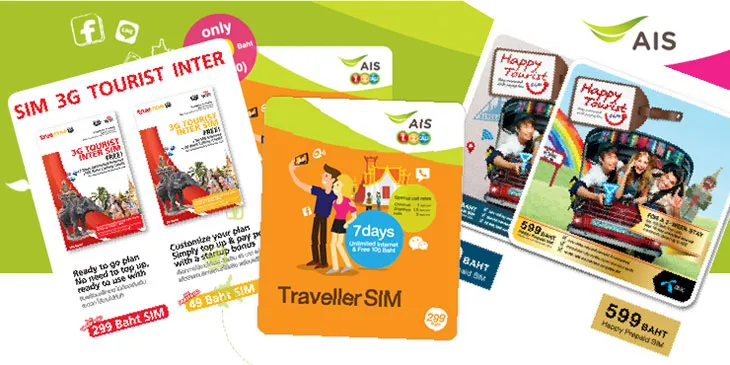
Now that you have your cash sorted, let’s talk about internet for your phone. Upon arriving at the arrivals area, you’ll notice three main internet provider options in Thailand: DTAC (blue), True (red), and AIS (green). To get a SIM card, just go to one the counters and inform them that you need a travel/tourist SIM card. They will present you with various package options, from a week to a maximum of 30 days. Don’t worry if you plan to stay longer than 30 days; you can easily top up and extend your plan online or in the app.
The packages offer both 4G and 5G options, with prices starting at 299 baht for a week’s plan. The cost for a 30-day unlimited plan is currently 999 baht, and it goes up to 1699 baht for 5G. Choose the plan that suits your needs best. There are other somewhat cheaper options but I think this is best and easiest to get you setup and on your way into the city. If you do not get a sim card at the airport you can get them at almost any store in Bangkok but you would need to know how to activate them, top up and choose your plan so it is easier to do it at the airport with English speaking staff that can help you.
Now that you’re equipped with high-speed internet, you should download some essential apps for your time in Thailand:
- Google Maps is the first choice and will be your best friend in navigating Bangkok,
- Google Translate for language assistance,
- For transportation, while there is no Uber, you can use the Grab app which you can use for transport, ordering food or groceries and even delivering packages across Bangkok. You can also use Grab to order a pickup at the airport but there are other options we will discuss below.
- To connect with locals, download the app “Line” by Naver instead of relying on WhatsApp/Viber and others. Everyone uses Line in Thailand as a messaging app to shopping and even banking.
- Tinder and my favorite Thai Friendly are for those interested in meeting new people in Thailand.
Bangkok airport taxis:
So let’s move on to transportation. Once you’re on the arrivals level, you’ll notice numerous rental car companies. However, in bustling Bangkok, renting a car may not be necessary and driving can be scary for first timers specially as they drive on the left side of the road like in the UK. Thailand has some of the worst road safety records in the world so maybe skip driving for now.
Instead, head down to the first level, where you’ll find taxis. As you step outside, you’ll see a row of taxis with lane numbers. Before hopping into a taxi, line up at one of the three queues: large taxi, regular taxi, or short distance. At the machines near the queues, press the button to obtain a ticket indicating your assigned lane number. Each taxi displays a corresponding lane number, so locate the taxi matching your ticket and inform the driver of your destination.
Most likely, the taxi will use the meter, ensuring a fair fare. But you could just ask “Meter?” and make sure he confirms and then turns on the meter once you start the journey. Always remember the taxi number just in case something happens or maybe you forget something in the taxi. Once on the road, the driver may ask if you want to take the highway/tollway, and if you do, they’ll request money for toll booths (either 20 baht or 50 baht). This is a legitimate charge, so have some small bills ready to cover the tolls. I would recommend using the tollway as you don’t want to be stuck in downtown Bangkok traffic for an hour or two after a 10-11 hour or longer flights.
Bangkok Airport rail link:
Now, if you’re looking for a budget-friendly way to reach downtown Bangkok, head to the low secret floor, known as the “B Floor,” where you’ll find the Airport Rail Link—a cost-effective mode of transportation. If it is your first time I would still recommend a taxi but if you’re feeling adventurous and are from a big city it should not be too difficult to figure it out.
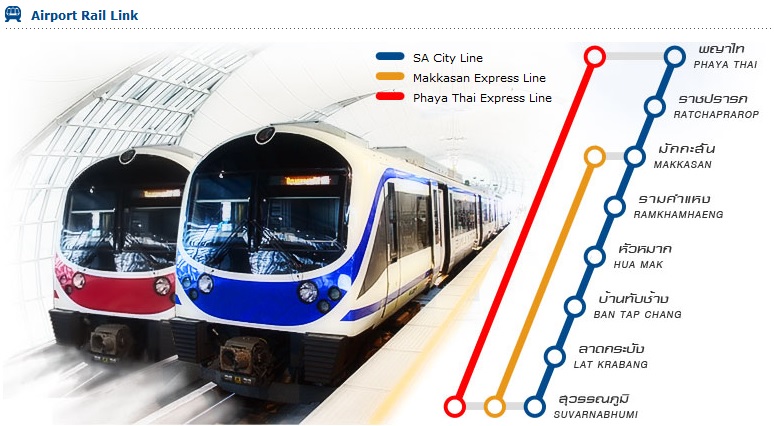
So, once you’ve made your way down to the basement, this is where I suggest purchasing your ticket. There’s a ticket booth nearby if you need assistance from an attendant, but using the machines is quite simple. To start, press the English button. You’ll notice there are only seven stops to choose from. Referencing your hotel map, the map of your destination, and the closest subway or BTS station you want to reach, select your destination.
The machines accept 20s, 50s, and 100 baht notes, as well as coins. insert your baht notes, and voila! You will receive a black token and change if there is some. The black token you’ll need to enter the station to board the train and keep it safe since you will need it to exit the station once you arrive at your destination.
Follow the signs and head to the station and the doors. Simply tap your token on the yellow reader, and the doors will open. Then take the escalators down and arrive at the platforms. Now, it’s just a matter of waiting for the train. Once the train arrives, allow all the passengers to disembark before boarding. It’s worth noting that there is also a security check before entering the train each time.
Taking the train is also a nice way to enjoy the view and zip past all the poor Bangkokians stuck in traffic.
Getting around in Bangkok:
Alright, so we’ve made it to the city center, whether you arrived by the airport rail link or took a taxi. Now, let me explain how to get around this city they call the “Big Mango,” Bangkok. It’s a huge city with an impressive transportation network.
Let’s start with the MRT, which is the underground train system. You can purchase a ticket from one of the machines or from the booth just like the Airport link. If you plan on using it frequently, I recommend getting an MRT card and loading it with few hundred baht and top it up whenever necessary. The initial fare is around 18 baht, and the final fare depends on the number of stops you travel, but it’s usually around 30 baht.
Now, if you look up above the streets, you’ll notice the sky train, also known as the BTS. Buying tickets can sometimes involve long queues, but there are plenty of ticket machines available and you can also use the booths. Just select English, choose your destination, and you’re good to go. You will also get a ticket to tap on the door scanner just like the airport rail link.
One thing to note is that the MRT and BTS are very similar in the way they operate but are separate systems, so they each have their own cards/tokens. For the BTS, it’s called the “Rabbit card.” If you’re planning to stay in Bangkok for a while, I highly recommend getting one. Every time you tap the card, it will display your remaining balance. Also many shopping mall food courts accept Rabbit card payments too. When you first get your card, you will need to show your passport but for topping up a card you don’t need to show it.
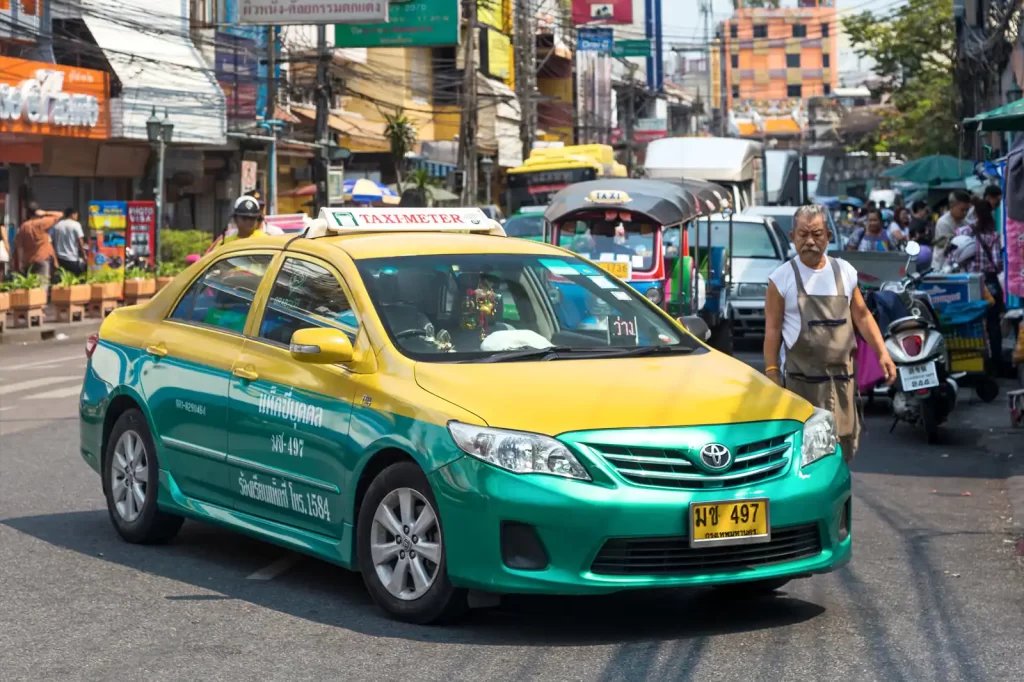
Bangkok has a million taxis and the famous tuk-tuks, but if you might want to consider taking a canal boat. These boats can swiftly navigate through the city, and the piers serve as stops. Make sure you know where to get on and off, and you’ll be charged accordingly. The fares are usually around 12 to 18 baht, making it a cheap, enjoyable, and efficient Bangkok experience. Make sure to be careful and quick when you get on and off these boats. Those are not for the older and people with disabiliaties.
Oh, and don’t forget about the motorbike taxis. These can be a bit adventurous and most injuries and deaths on Thailand’s roads are from people riding on their motorbikes so makes you have good health insurance and make sure it covers motorbike accidents.
If something should happen and you need help you can dial 1155 that is the number of the Tourist police and is available 24 hours a day and they will all speak English. This is probably the most important number to remember for your trip.
Now head out and enjoy your time in Bangkok aka The big Mango and send me some stories about your adventures so I can publish them on the site.
